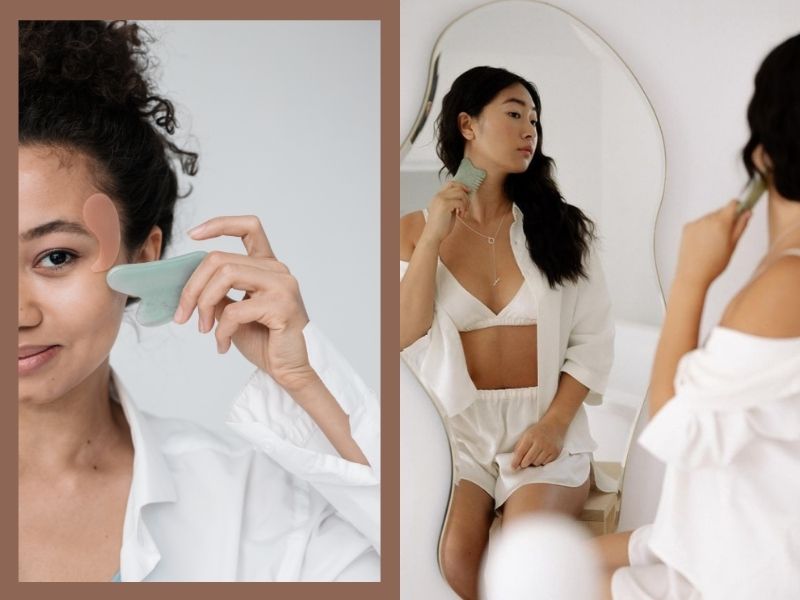
If you’re a mega skincare junkie, you’ve probably come across this much-hyped beauty tool all over social media. From aesthetic Pinterest and Instagram layouts to countless tutorials on TikTok and YouTube, Gua Sha is everywhere right now. For those who aren’t familiar with this new beauty trend, you might be wondering what exactly Gua Sha is. That’s where we come in. So sit back and relax as we walk you through our complete guide to the Gua Sha facial tool including its benefits, massage techniques, and tips on picking one.
What is Gua Sha?
Gua Sha is a massage method that uses scraping or rubbing motions (Gua) to promote redness (Sha). The concept is not a new one and is the modern-day result inspired by traditional practices. It was initially (and still is) used to relieve muscle pain and remove unhealthy toxins from the body.
Particularly, Gua Sha was believed to help dispel bad qi or energy, which is especially crucial according to ancient Chinese culture. It is said that the key to a healthier life is when one’s qi is flowing freely and well-balanced. And if it’s not, it is believed that you’ll start to feel muscle tension and joint pain whenever this life force is blocked.
The act was also known as coining or spooning, as people previously used coins and other similar objects to practise Gua Sha. With this older method, you’ll usually see some blemished, purplish, or reddish marks on the skin due to broken capillaries.
Since then, Gua Sha has been modified into a gentler and more soothing technique that best suits facial therapies instead. This is typically done with a smooth and flat tool to lightly massage the skin without bruising it.
What Are The Benefits Of Using A Gua Sha Facial Tool?
Provides An Outlet To Destress & Relax
There’s a lot of built-up tension that we store in the face and neck. Thus, using a Gua Sha tool benefits your skin by enabling you to thoroughly massage even the innermost crevices of your facial muscles. By doing this, not only will you get to destress, but you’ll also be preventing ageing and softening fine lines and wrinkles.
Improves Blood Circulation For Glowy Skin
Apart from being incredibly therapeutic, another Gua Sha facial benefit is that it promotes better blood circulation. The result? A dewier and glowing, glass-skin complexion to rival that of your favourite K-pop idol’s.
Sculpts & Lifts The Face
Always wanted a sharper jawline? Good news: that’s one of the benefits of Gua Sha! This skincare tool can give your face a more lifted and sculpted appearance through its solid edges. You’ll see signs of reduced puffiness, firmer skin, and fewer wrinkles and dark circles with consistent use.
How To Use A Gua Sha Facial Tool
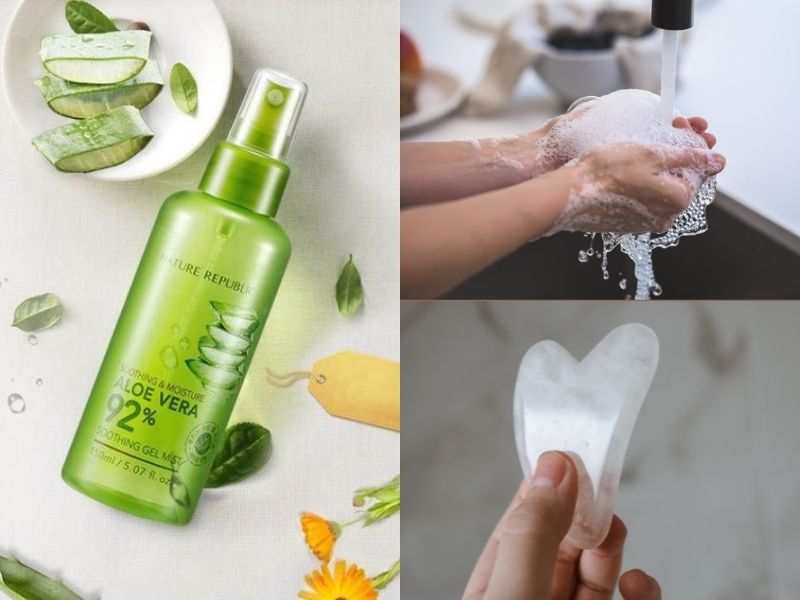
Tool & Face Prep
- First, make sure that your Gua Sha tool is clean by washing it with soap and water. Store it in the fridge for a few hours to enjoy a calming, cooling sensation during your facial later on.
- Cleanse your face and prep the skin with your go-to serum, hydrating mist, moisturiser, or facial oil. This creates a proper slip that allows the stone to glide smoothly over the skin. Note: You should never use your Gua Sha tool on bare skin as this could cause irritation.
For Neck
- Experts recommend starting from the neck and moving upwards towards the forehead. In doing so, you’re setting a clear path for your fluids to drain.
- Begin your Gua Sha facial by massaging the back of your neck using the notched side. Start from your lower neck (where the spine is) and move the tool upwards to the top where your skull begins. Gently wiggle the tool to apply deeper pressure to this bone area. Repeat five times.
- For the sides of your neck, you can use the concave part of the tool or stick with the notched end. Use the same upward motions to give a deeper massage in the areas just below the ears. Repeat five times.
- Now onto the front of your neck. Place your hand underneath one collarbone, use the outer curved side of the tool and move upwards toward the jaw and wiggle for pressure. Repeat five times. Similarly, for the centre of the neck, hold down the sternum and move upwards.
For Face
- Place your hand on the centre of your chin and hold it down for support. Use the notched end and scrape alongside the jawline to the ears. Repeat five times.
- Use the concave or inner curved side of the tool for the centre of the face. Hold down your finger next to the bottom of your nose. Then glide it alongside the cheeks to the ears with a slight upwards angle. This helps create a more lifted shape. Wiggle to apply pressure on the areas behind the ears to eliminate tension. Repeat five times.
- Apply the lightest, feather-like pressure when massaging the under-eye area. Be careful not to drag or pull the skin. Place your finger on the inner corner of your eye; this will be your starting point. Then use one of the notches to glide it slowly over the entire under-eye and up to the hairline. Wiggle for pressure and repeat five times.
- For the brow bones, place your fingers in between the brows. Use the notched side, with the bigger notch positioned on top, and scrape along the natural curve of your brow bone. Angle the tool upwards at the end of the brow bone, continue to scrape towards the hairline and wiggle. Repeat five times.
- For the sides of your forehead, place your fingers on the eyelid or underneath the brow bone. Using the concave side, gently roll over your brow bone, move it up to your forehead till it reaches the hairline. Massage with a wiggle and repeat five times.
- To massage the centre of the forehead, place your fingers in between your brows and scrape upwards. Massage the hairline with a wiggle and repeat five times.
- Repeat the whole process on the other side of your face.
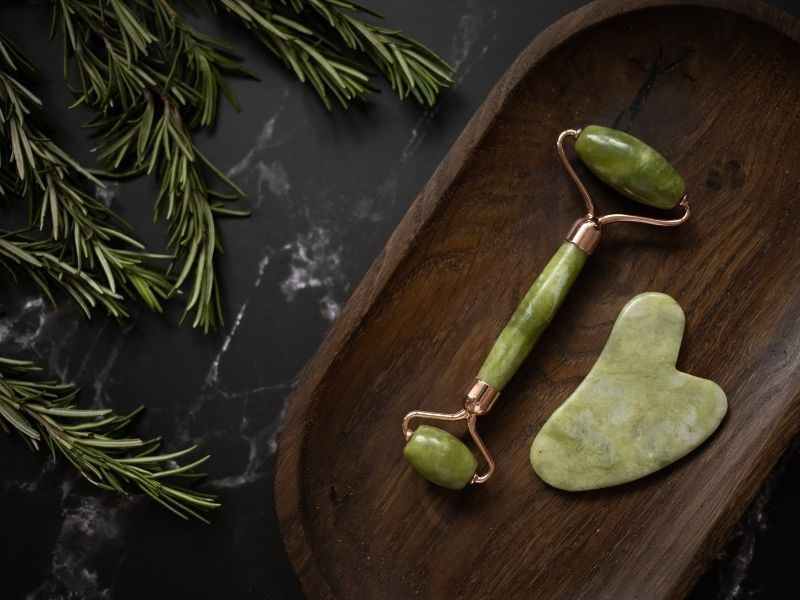
How To Choose A Gua Sha Facial Tool
There are various forms of Gua Sha facial tools in different shapes and even stone types. Each one targets a specific muscle or area of the skin. So select your tool according to your needs.
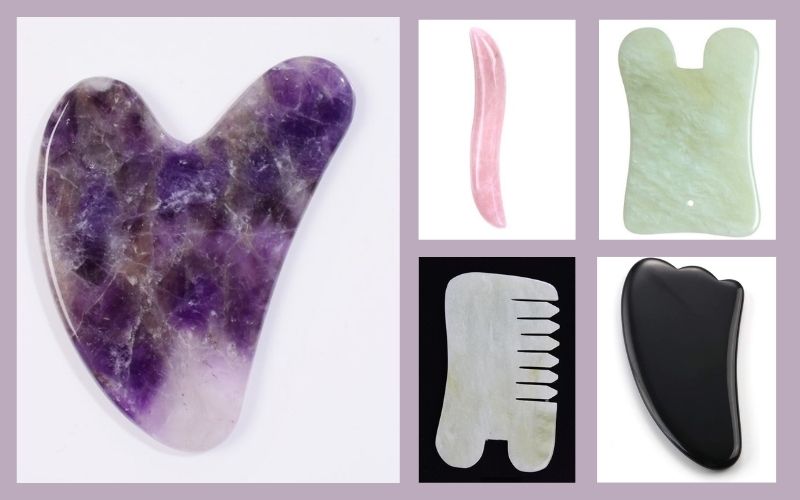
Types of Gua Sha Shapes
- Dolphin shapes are recommended for beginners as they’re the easiest to hold. Their wider surface makes it the best option to massage areas such as the neck, shoulders, and chin.
- Teeth edges have this comb- or teeth-like structure that are ideal for targeting the chin, cheeks, and forehead. It also helps with fine lines and wrinkles.
- S shapes are quite versatile, allowing you to tackle sensitive areas like your under-eyes, neck, cheeks, and cheekbones for better blood circulation. Apart from the face and neck, you can also use them for your back, feet, hands, thighs, and glutes. Use the thicker side for denser body parts and the thinner side for sensitive areas.
- Wing shapes have three rounded edges on one side of the tool. This makes it closely resemble a bird’s wing, hence the name. These arches are useful for scraping alongside the brows and other smaller areas of the face.
- Square or cleft shapes have two pronounced notches that are designed to perfectly hug and sweep across the jawline.
Types Of Gua Sha Stone Materials
- Jade: Good for contouring, bringing balance, reducing puffiness, and lymphatic drainage.
- Rose Quartz: Has calming properties that clear out negativity and toxins. Best suited for sensitive skin.
- Amethyst: Leaves a cooling effect on the skin and helps to ease muscle tightness stored in the jaw and temples. It’s said to be able to ward off negative energy as it produces negative ions.
- Black Obsidian: Containing the most powerful energies—water, earth, and fire—this Gua Sha facial stone is designed to get rid of negative emotions and thoughts in the body. It also assists in strengthening muscle tissues.
Give Yourself A Gua Sha Facial Massage Thrice A Week To Destress & Relax At Home
Now that you know the benefits of Gua Sha and the step-by-step process, it’s time to treat yourself to a relaxing Gua Sha facial at home! Remember to keep these golden rules in mind: Firstly, always hold the tool flat and never place the sharp edges directly against your skin. Second, always maintain a light to medium pressure, and use slow and gentle strokes when massaging your face and neck.
Ideally, it’s advisable to have a Gua Sha face massage at least three times a week to see results. However, if you’re suffering from pimples, cystic acne, and rosacea, it’s better to avoid using a Gua Sha tool until the blemishes clear up. Dealing with the dreaded ‘maskne’ and in need of a solution? Here’s how you can get rid of acne caused by your face masks.